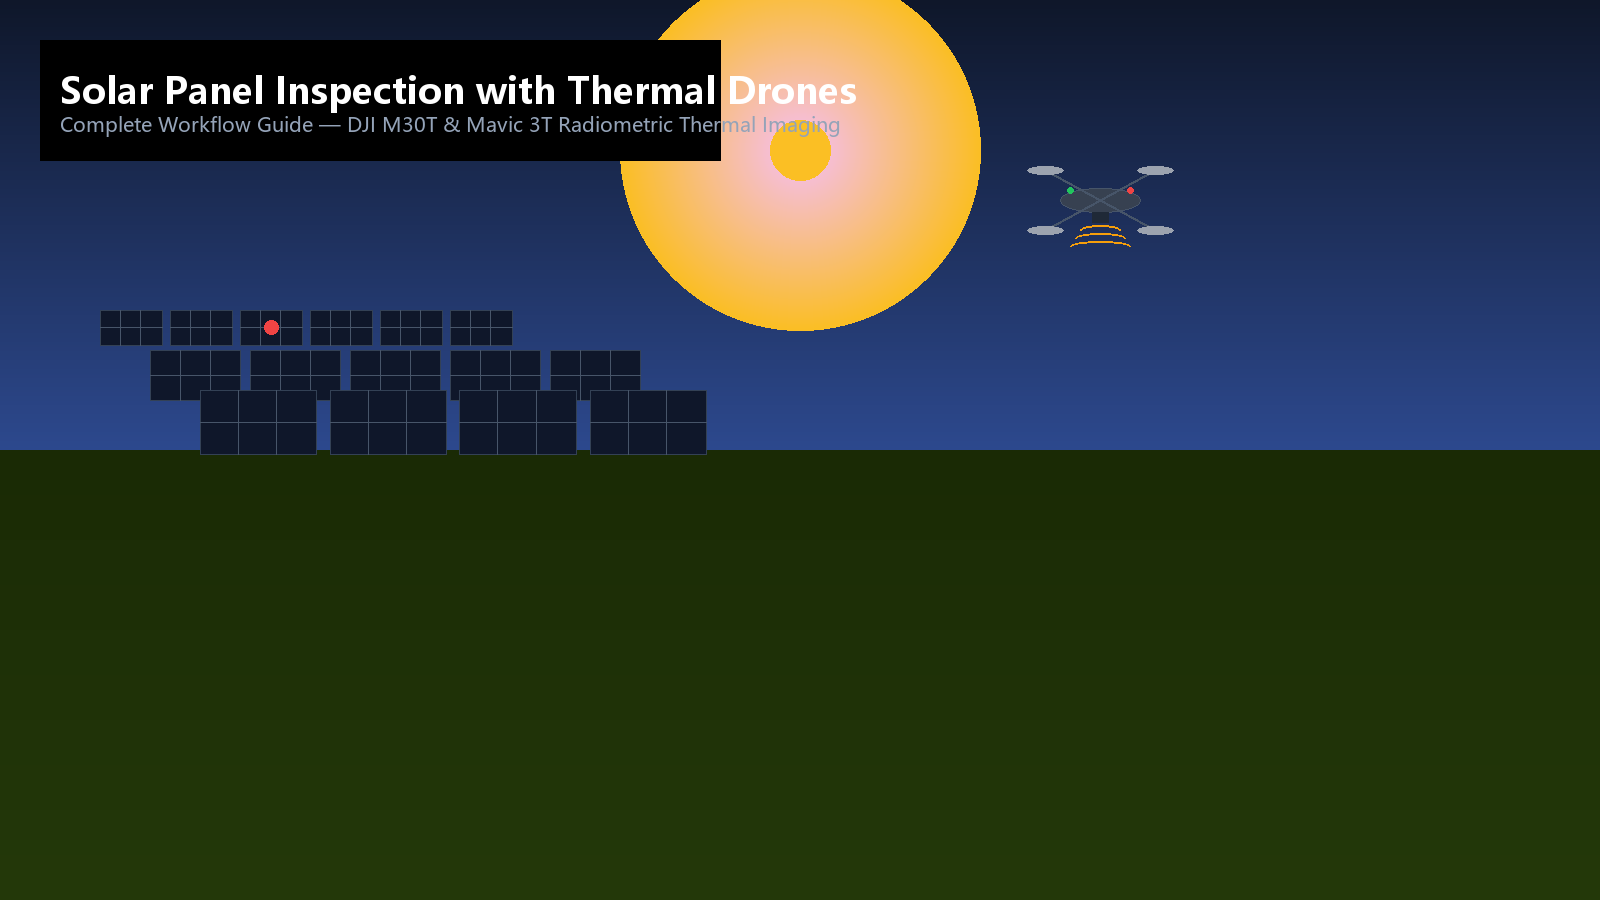
Solar Panel Inspection with Thermal Drones: Complete Workflow
Why Solar Panel Inspection Matters
Solar photovoltaic (PV) installations generate revenue only when every panel operates at peak efficiency. A single defective cell, a micro-crack in a soldered junction, or a degraded bypass diode can reduce an entire module's output by 30% to 80%. Across a utility-scale solar farm with tens of thousands of panels, these losses compound into millions of dollars in unrealized energy production annually.
Traditional solar panel inspection methods — visual walk-down surveys and handheld infrared thermography — are labor-intensive, time-consuming, and inherently limited in scope. A technician walking rows of panels under the midday sun can identify obvious damage like shattered glass or vegetation encroachment, but cannot safely or practically assess the thermal condition of every module. Handheld thermal cameras require close proximity, exposing technicians to rooftop hazards or the uneven terrain of ground-mount installations. The result: most solar farms undergo comprehensive thermal inspections only once or twice per year, if at all, leaving defects undetected for months.
Thermal drone inspection transforms this paradigm. By mounting radiometric thermal cameras on autonomous or semi-autonomous drones, solar operators can survey hundreds of acres of PV modules in a single flight, capturing temperature data for every panel in the array. Hotspots — the thermal signature of electrical faults, shading issues, and cell degradation — become immediately visible in real-time video feeds and post-processing software. What once took weeks of ground-based inspection can now be completed in hours, with higher accuracy and repeatable results that enable trend analysis over time.
The Technology Behind Thermal Solar Inspection
Radiometric Thermal Imaging
Unlike standard infrared cameras that produce qualitative thermal images, radiometric thermal cameras assign an actual temperature value to every pixel in the image. This quantitative measurement is essential for solar inspection, where the diagnostic value lies not in seeing "hot" versus "cold" but in measuring precise temperature differentials between cells, between modules, and between adjacent modules under identical irradiance conditions.
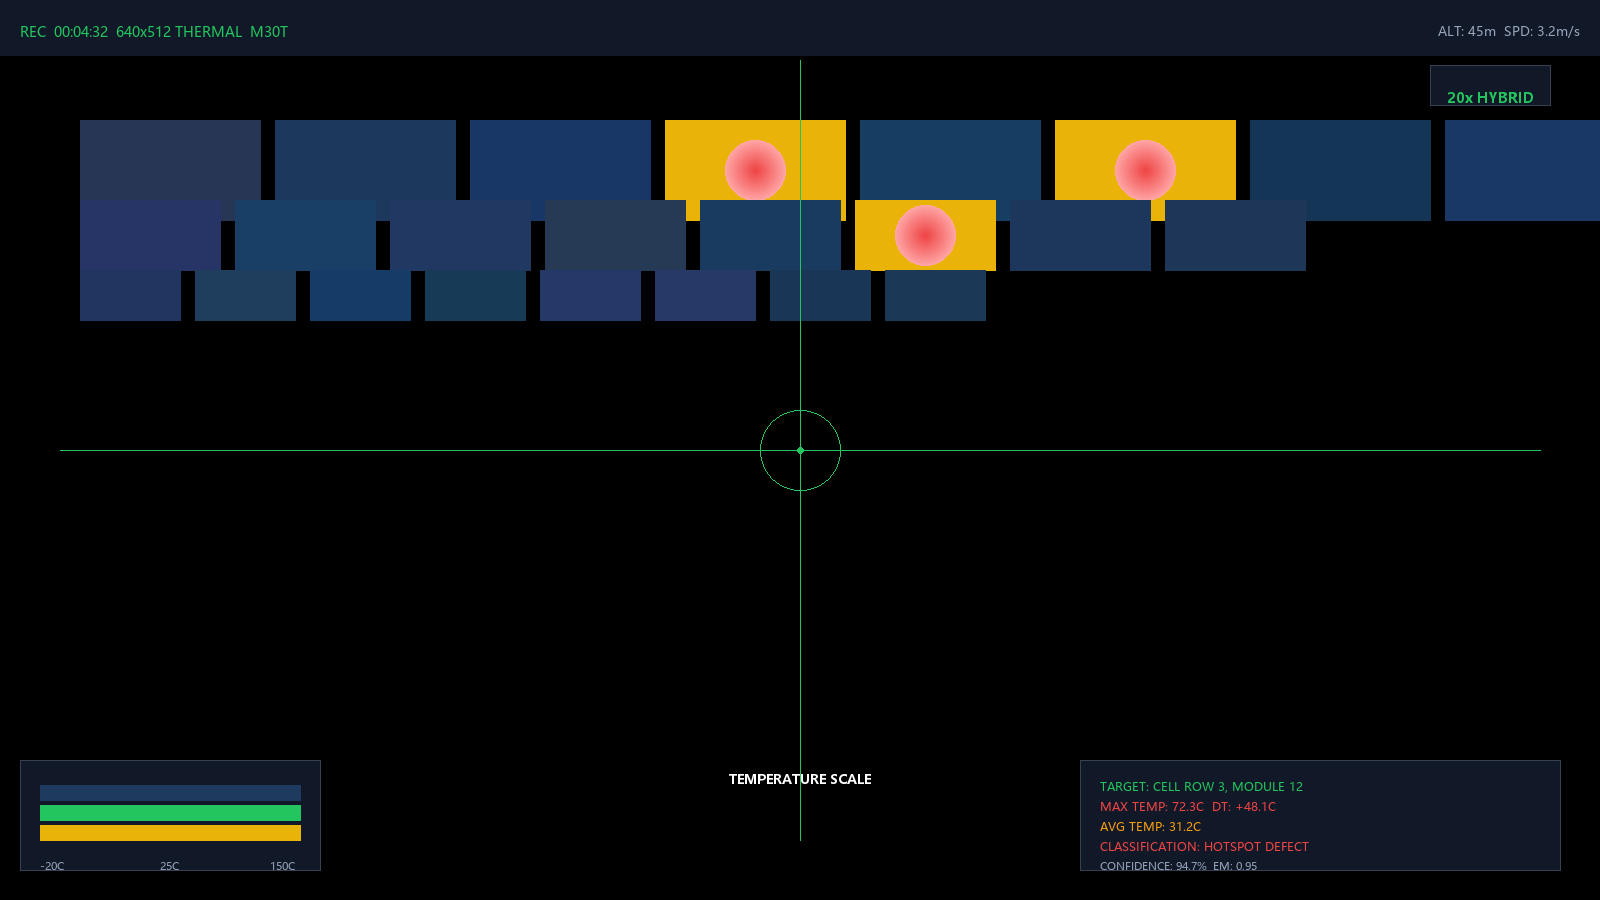
The DJI M30T carries a 640×512 resolution radiometric thermal camera with a temperature measurement range of -20°C to 150°C and thermal sensitivity (NETD) of ≤40 mK. Its 20× hybrid zoom enables detailed thermal imaging of individual panels from a safe distance. The DJI Mavic 3 Thermal (Mavic 3T) offers a more compact option with a 640×512 thermal camera, 20× hybrid zoom, and a measurement range of -20°C to 550°C — suitable for smaller solar installations and rooftop arrays.
Both platforms integrate thermal and visible-light imagery, allowing inspectors to overlay thermal data onto high-resolution visual photographs. This dual-sensor approach ensures that every thermal anomaly can be cross-referenced with its physical appearance, distinguishing between genuine defects (delaminated encapsulant, burnt junction box) and benign thermal patterns (normal current flow, partial shading from bird droppings).
Automated Flight Paths
Consistent, repeatable solar inspection requires the drone to fly the same path at the same altitude, angle, and speed on every mission. Manual piloting introduces variability that compromises data quality — a slightly different flight altitude changes the ground sample distance, affecting temperature measurement accuracy. Automated flight planning eliminates this variable.
Using DJI Pilot 2's mission planning tools or third-party solutions like DroneDeploy and Pix4Dcapture, inspectors define a grid-based flight path that covers the entire solar array. The drone automatically executes the mission, maintaining a constant altitude above the panel surface, adjusting its heading to keep the camera perpendicular to the modules for maximum thermal resolution. Waypoints, speed limits (typically 2–4 m/s for thermal imaging), and overlap margins are all pre-programmed.
The automated flight ensures that every inspection produces comparable data. Defects identified in one flight can be precisely located and re-verified in subsequent flights, enabling operators to track defect progression and prioritize maintenance interventions.
Complete Solar Panel Inspection Workflow
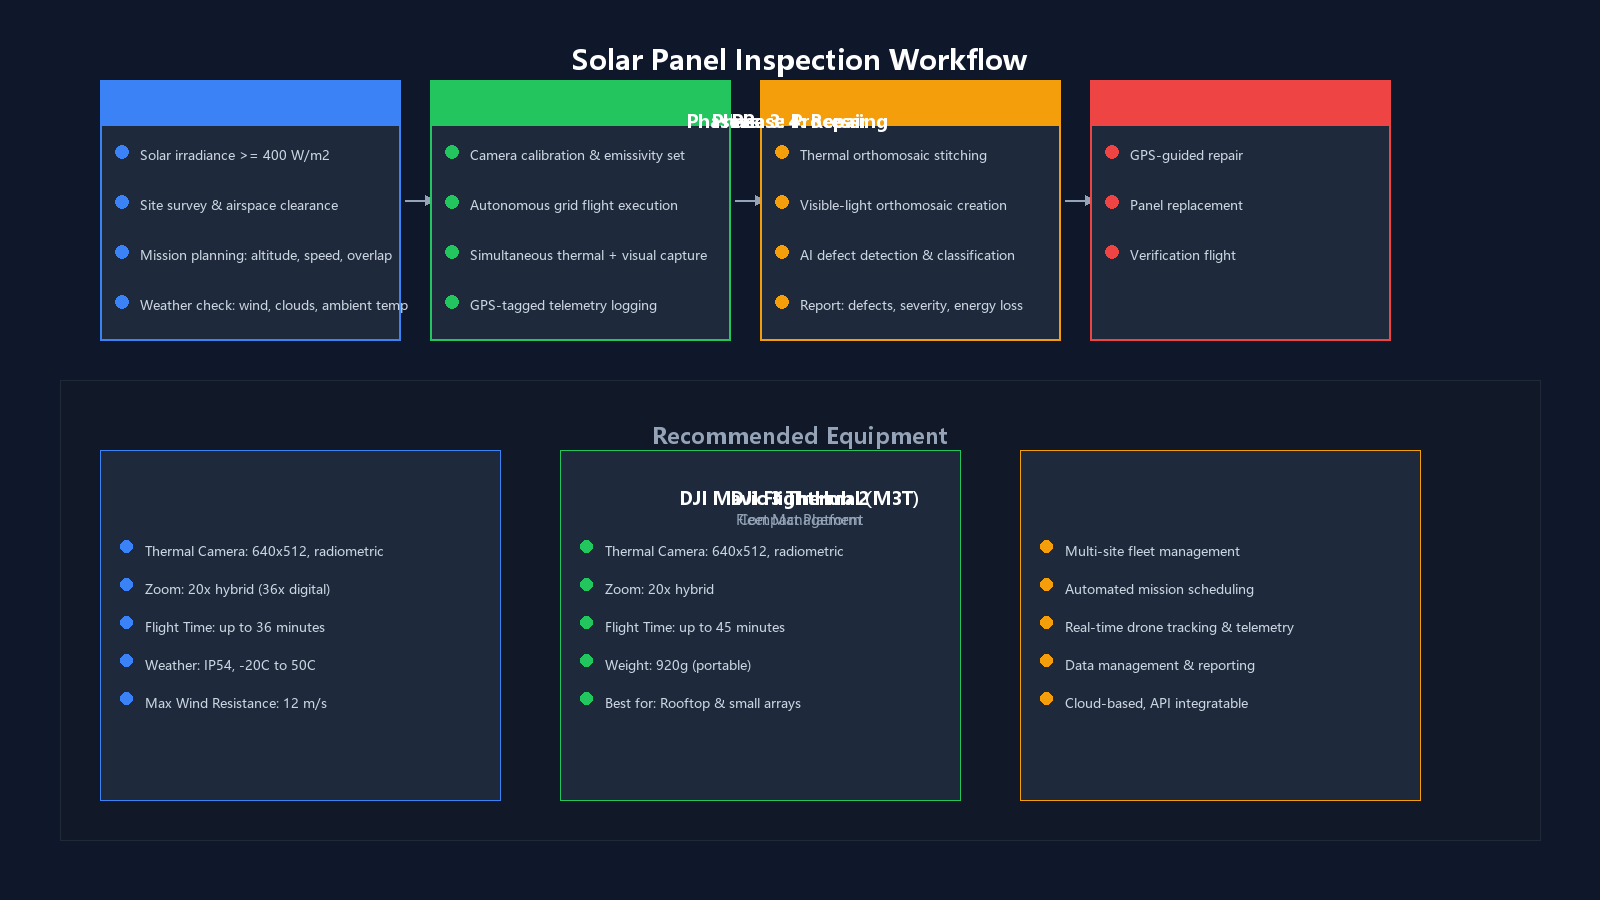
Phase 1: Pre-Flight Planning
Effective thermal solar inspection begins long before the drone takes off. Proper planning ensures the collected data is diagnostically valuable.
1. Irradiance requirements. Thermal detection of solar panel defects requires sufficient solar irradiance — typically a minimum of 400 W/m² — to create measurable temperature differentials between healthy and defective cells. Inspections are ideally conducted between 10:00 AM and 2:00 PM on clear, sunny days. Cloudy conditions, high winds, or rainfall make thermal inspection ineffective because insufficient irradiance prevents defect-related heating from becoming visible.
2. Site survey and airspace clearance. Before flight, the inspector reviews the solar farm's layout using satellite imagery or GIS data to identify panel boundaries, access points, and obstacles (transmission lines, nearby structures, vegetation). Airspace authorization is obtained if the site is within controlled airspace. Weather conditions are verified — wind speed must be below the drone's operational limit (typically 10–12 m/s for the M30T and Mavic 3T), and ambient temperature must fall within the drone's operating envelope.
3. Mission planning. The flight path is designed in DJI Pilot 2 or a third-party mission planner. Key parameters include:
- Flight altitude: Typically 30–60 meters above the panel surface, balancing thermal resolution with coverage speed. Lower altitudes provide finer pixel-level detail but require more flight time.
- Ground Sample Distance (GSD): Target GSD of 2–5 mm/pixel for thermal imaging ensures individual panels are represented by sufficient thermal pixels for defect detection.
- Speed: 2–4 m/s to minimize motion blur and maintain thermal camera exposure stability.
- Overlap: 60–80% forward and side overlap ensures complete coverage with no gaps between flight strips.
- Simultaneous capture: Both thermal and visible-light cameras are triggered at each waypoint to enable co-registered dual-sensor output.
Phase 2: Data Acquisition
On the day of inspection, the field team executes the pre-planned mission.
1. Equipment preparation. The thermal camera is calibrated according to manufacturer specifications. For the M30T, this involves enabling the shutter auto-calibration and verifying the emissivity setting (typically 0.95 for solar panel surfaces). Battery levels, SD card capacity, and GPS lock are confirmed before launch.
2. Autonomous flight execution. The drone is launched at the designated takeoff point, either manually or via automated takeoff. Once the drone reaches the first waypoint, it transitions to autonomous mission mode. The pilot monitors the live thermal feed and flight telemetry but does not control the aircraft's trajectory. Real-time hotspot detection is possible using built-in thermal analysis tools — the M30T's live feed displays temperature overlays with customizable threshold colors, allowing the pilot to flag anomalies during the flight.
3. Data logging. Every thermal image and visible-light photograph is tagged with GPS coordinates, altitude, flight attitude, and time stamp. This metadata is critical for georeferencing defects and correlating thermal readings with solar irradiance conditions at the moment of capture.
Phase 3: Post-Processing and Analysis
Data acquired in the field must be processed to extract actionable intelligence.
1. Thermal image stitching. Individual thermal frames are stitched into orthomosaic maps using photogrammetric software such as DJI Terra, Pix4Dmapper, or DroneDeploy. The resulting thermal orthomosaic represents the entire solar array as a single georeferenced image, with each pixel carrying a temperature value.
2. Visible-light orthomosaic. Simultaneously, the high-resolution visible-light images are processed into a color orthomosaic, providing a detailed visual reference for every panel in the array.
3. Defect detection and classification. Thermal analysis software applies algorithms to identify panels or cells exhibiting abnormal temperature patterns. Defects are classified by severity and type:
- Hotspot defects: Individual cells or cell strings running 10–30°C above ambient, indicating series resistance faults, cracked cells, or solder bond failures.
- Module-level anomalies: Entire modules running warmer than neighboring modules, suggesting bypass diode failure, junction box degradation, or soiling/shading issues.
- Inter-row temperature differences: Systematic temperature variations between rows that may indicate orientation errors, inverter mismatches, or string-level electrical faults.
4. Report generation. Each detected defect is geotagged, categorized, and assigned a severity score. The final inspection report includes:
- Thermal and visual orthomosaics of the entire array
- Defect inventory with GPS coordinates, photos, and severity ratings
- Estimated energy loss per defect and aggregate loss for the installation
- Maintenance recommendations prioritized by severity
- Comparison data if previous inspections exist (trend analysis)
Phase 4: Maintenance and Verification
The inspection report guides maintenance teams to specific defective panels with precise GPS coordinates. Ground crews can locate and repair or replace faulty modules efficiently. After maintenance, a follow-up thermal drone flight verifies that all identified defects have been resolved and checks for any additional issues that may have been missed in the initial inspection.
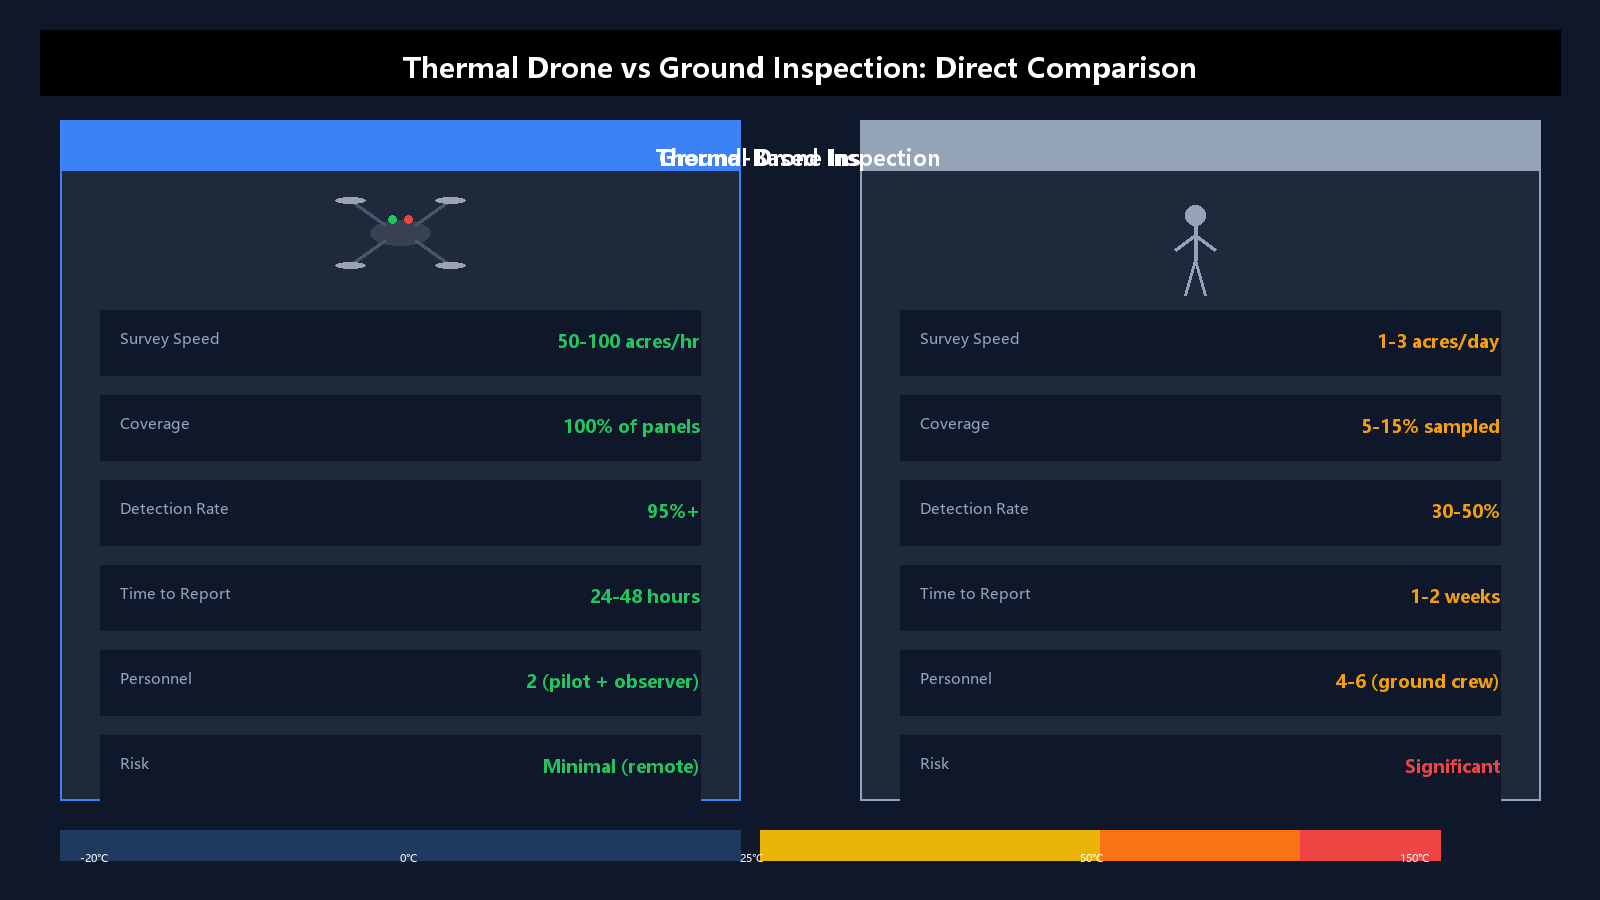
Thermal Drone vs. Ground Inspection: A Direct Comparison
| Parameter | Thermal Drone Inspection | Ground-Based Inspection |
|---|---|---|
| Survey speed | 50–100 acres per hour | 1–3 acres per day |
| Temperature accuracy | ±2°C (radiometric) | ±3–5°C (handheld) |
| Coverage completeness | 100% of panels | Typically 5–15% sampled |
| Personnel required | 2 (pilot + observer) | 4–6 (ground crew) |
| Time to report | 24–48 hours | 1–2 weeks |
| Defect detection rate | 95%+ | 30–50% |
| Risk to personnel | Minimal (remote operation) | Significant (rooftop/terrain hazards) |
| Repeat inspection cost | Low (automated mission) | High (man-hours) |
Best Practices for Thermal Solar Inspection
- Inspect under optimal irradiance: Minimum 400 W/m² solar irradiance, preferably 600–1000 W/m² for maximum defect visibility.
- Calibrate thermal cameras before each flight: Auto-shutter calibration eliminates sensor drift and ensures measurement accuracy.
- Maintain consistent flight altitude: Use RTK GPS for centimeter-level positioning accuracy, ensuring uniform GSD across the entire array.
- Capture both thermal and visible-light data: Dual-sensor fusion enables accurate defect classification and reduces false positives.
- Document environmental conditions: Record ambient temperature, wind speed, and solar irradiance at the time of each flight for proper data interpretation.
- Schedule regular inspections: Conduct thermal inspections at least twice per year — before peak summer production and after winter — to catch seasonal defects early.
- Maintain inspection history: Archive all inspection data to enable longitudinal analysis. Tracking defect evolution over time helps predict panel lifespan and optimize replacement schedules.
Applications Beyond Utility-Scale Solar Farms
While utility-scale solar farms represent the largest market for thermal drone inspection, the technology is equally valuable for:
- Rooftop commercial and industrial (C&I) solar installations: Thermal drones can inspect large commercial rooftops without requiring rope-access technicians or scaffolding, significantly reducing inspection cost and risk.
- Residential solar arrays: For neighborhoods or campuses with distributed rooftop solar, a single drone flight can survey dozens of installations, identifying underperforming panels for targeted maintenance.
- Solar tracker systems: Thermal inspection reveals tracker misalignment issues — panels that are not optimally oriented toward the sun create abnormal thermal signatures that indicate mechanical or electrical faults in the tracking system.
- Off-grid and remote installations: In desert, mountain, or island installations where ground access is difficult or dangerous, thermal drones provide the only practical means of comprehensive inspection.
Frequently Asked Questions
What is the minimum solar irradiance required for thermal drone inspection?
Most thermal inspection standards require a minimum solar irradiance of 400 W/m² at the panel surface. This ensures that defective cells generate enough heat differential to be detectable by the thermal camera. Below this threshold, many defects — particularly micro-cracks and weak solder bonds — produce insufficient heat to be reliably identified.
Can thermal drones detect all types of solar panel defects?
Thermal drones excel at detecting heat-related defects: cell cracks, hotspots, bypass diode failures, junction box issues, solder bond degradation, and shading/soiling effects. However, some defects — such as delamination that does not affect thermal conductivity, or physical damage that has not yet caused electrical resistance changes — may not produce visible thermal signatures. Combining thermal inspection with visual inspection (using the M30T or Mavic 3T's visible-light camera) maximizes defect detection coverage.
How often should solar installations undergo thermal drone inspections?
Utility-scale solar farms should undergo thermal inspections at least twice per year — ideally before the peak production season (spring) and after the highest-stress period (late summer). For new installations, an initial inspection within the first 6 months of commissioning establishes a baseline and catches any early-life defects covered under warranty. High-value installations may benefit from quarterly inspections.
What is the typical cost of a thermal drone solar inspection?
A professional thermal drone inspection service typically costs $500 to $2,000 per megawatt, depending on site size, accessibility, and reporting requirements. For a 10 MW solar farm, total inspection costs range from $5,000 to $20,000 — a fraction of the cost of ground-based inspection and far less than the revenue lost to undetected defects over a single month of operation.
Which drone is best for solar panel inspection?
The DJI M30T is the industry standard for utility-scale solar inspection, offering a 640×512 radiometric thermal camera, 20× hybrid zoom, IP54 weather resistance, and up to 36 minutes of flight time. The DJI Mavic 3T is ideal for smaller installations, rooftop surveys, and rapid-response inspections, with comparable thermal resolution in a more portable form factor. Both drones support automated flight missions through DJI Pilot 2 and integrate with post-processing software for comprehensive defect analysis.
Conclusion
Thermal drone inspection has become the gold standard for solar panel maintenance, delivering comprehensive, accurate, and repeatable assessments of PV array health at a fraction of the time and cost of traditional methods. With radiometric thermal cameras mounted on platforms like the DJI M30T and Mavic 3T, automated flight paths ensuring consistent data quality, and sophisticated post-processing software transforming raw thermal images into actionable defect reports, solar operators can now identify and resolve issues before they significantly impact energy production and revenue.
Whether you manage a utility-scale solar farm, a commercial rooftop installation, or a distributed portfolio of solar assets, thermal drone inspection provides the visibility and precision needed to maximize your solar investment's return. Contact our team to discuss how thermal drone inspection can be integrated into your solar maintenance program.